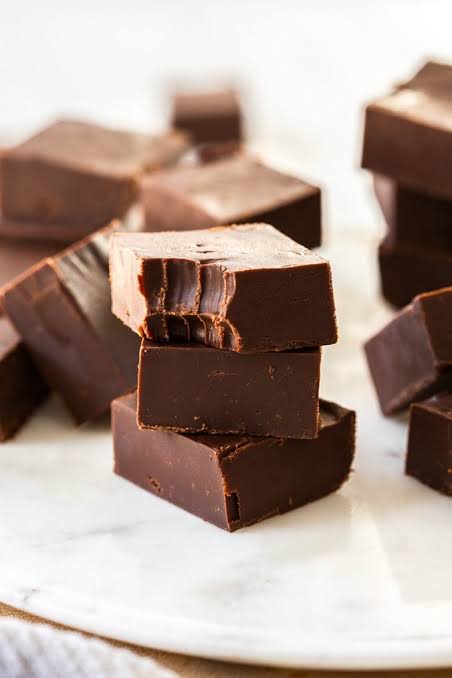
3-MINUTE CHOCOLATE FUDGE
When a serious chocolate craving hits, you do not always want to spend an hour in the kitchen. This 3-minute chocolate fudge is the perfect solution. It is rich, creamy, intensely chocolatey, and incredibly simple to prepare.
With just a few basic ingredients and a short amount of preparation time, you can make a smooth homemade fudge that tastes far more complicated than it actually is. There is no candy thermometer, no complicated stovetop technique, and no long cooking process required.
This quick chocolate fudge recipe is especially useful when you need a last-minute dessert for guests, a simple holiday treat, a homemade edible gift, or something sweet to satisfy an afternoon chocolate craving.
WHY YOU’LL LOVE THIS 3-MINUTE CHOCOLATE FUDGE
- Extremely quick: The chocolate mixture comes together in only a few minutes.
- Easy preparation: You do not need advanced candy-making skills.
- Rich chocolate flavor: Chocolate and cocoa create a deep, satisfying taste.
- Creamy texture: The finished fudge is soft, smooth, and easy to bite.
- Perfect for beginners: There is no complicated candy thermometer technique.
- Easy to customize: Add nuts, chocolate chips, dried fruit, or other favorite toppings.
- Great for gifting: Cut the fudge into small squares and package it for holidays or special occasions.
3-MINUTE CHOCOLATE FUDGE AT A GLANCE
- Prep Time: 3 minutes
- Chilling Time: 1–2 hours
- Total Time: About 1–2 hours including chilling
- Servings: Approximately 24 small squares
- Difficulty: Easy
- Method: Microwave or quick stovetop preparation
INGREDIENTS
- 2 cups semi-sweet chocolate chips
- 1 can (14 ounces) sweetened condensed milk
- 2 tablespoons unsalted butter
- 1 teaspoon vanilla extract
- 1/4 teaspoon salt
OPTIONAL ADD-INS
The basic recipe creates rich and creamy chocolate fudge, but you can easily customize it with your favorite additions.
- 1/2 cup chopped walnuts or pecans
- 1/2 cup mini chocolate chips
- 1/3 cup dried cranberries
- 1/3 cup shredded coconut
- 1/2 teaspoon instant espresso powder
- A small pinch of flaky sea salt for topping
HOW TO MAKE 3-MINUTE CHOCOLATE FUDGE
STEP 1: PREPARE THE PAN
Line an approximately 8-inch square baking pan with parchment paper, leaving some parchment hanging over the sides. The overhanging parchment will make it easier to lift the chilled fudge out of the pan later.
Lightly grease the pan before adding the parchment if necessary to help keep the paper in place.
STEP 2: COMBINE THE CHOCOLATE, CONDENSED MILK, AND BUTTER
Place the chocolate chips, sweetened condensed milk, and butter in a microwave-safe bowl.
Make sure the bowl is completely dry. Even a small amount of water can cause melted chocolate to seize and become grainy.
STEP 3: MELT THE CHOCOLATE
Microwave the mixture in short intervals, stirring thoroughly between each interval.
Heat until the chocolate is mostly melted and the mixture is smooth. The exact time will depend on the strength of your microwave, so short intervals are safer than heating the chocolate continuously.
Once the chocolate is almost completely melted, continue stirring. The remaining chocolate should melt from the residual heat.
STEP 4: ADD VANILLA AND SALT
Stir in the vanilla extract and salt until completely incorporated.
The vanilla enhances the chocolate flavor, while the small amount of salt balances the sweetness and makes the chocolate taste richer.
STEP 5: ADD OPTIONAL INGREDIENTS
If you are using chopped nuts, dried fruit, coconut, espresso powder, or additional chocolate chips, fold them into the warm mixture.
Work relatively quickly because the fudge mixture will begin to thicken as it cools.
STEP 6: TRANSFER TO THE PAN
Pour the chocolate mixture into the prepared pan.
Use a spatula to spread it evenly and smooth the surface.
If desired, sprinkle the top with chopped nuts, mini chocolate chips, or a small amount of flaky sea salt.
STEP 7: CHILL UNTIL FIRM
Place the pan in the refrigerator for approximately 1–2 hours, or until the fudge is firm enough to cut.
For a firmer texture, you can chill it longer. Allowing the fudge to set completely makes it much easier to cut into clean squares.
STEP 8: CUT AND SERVE
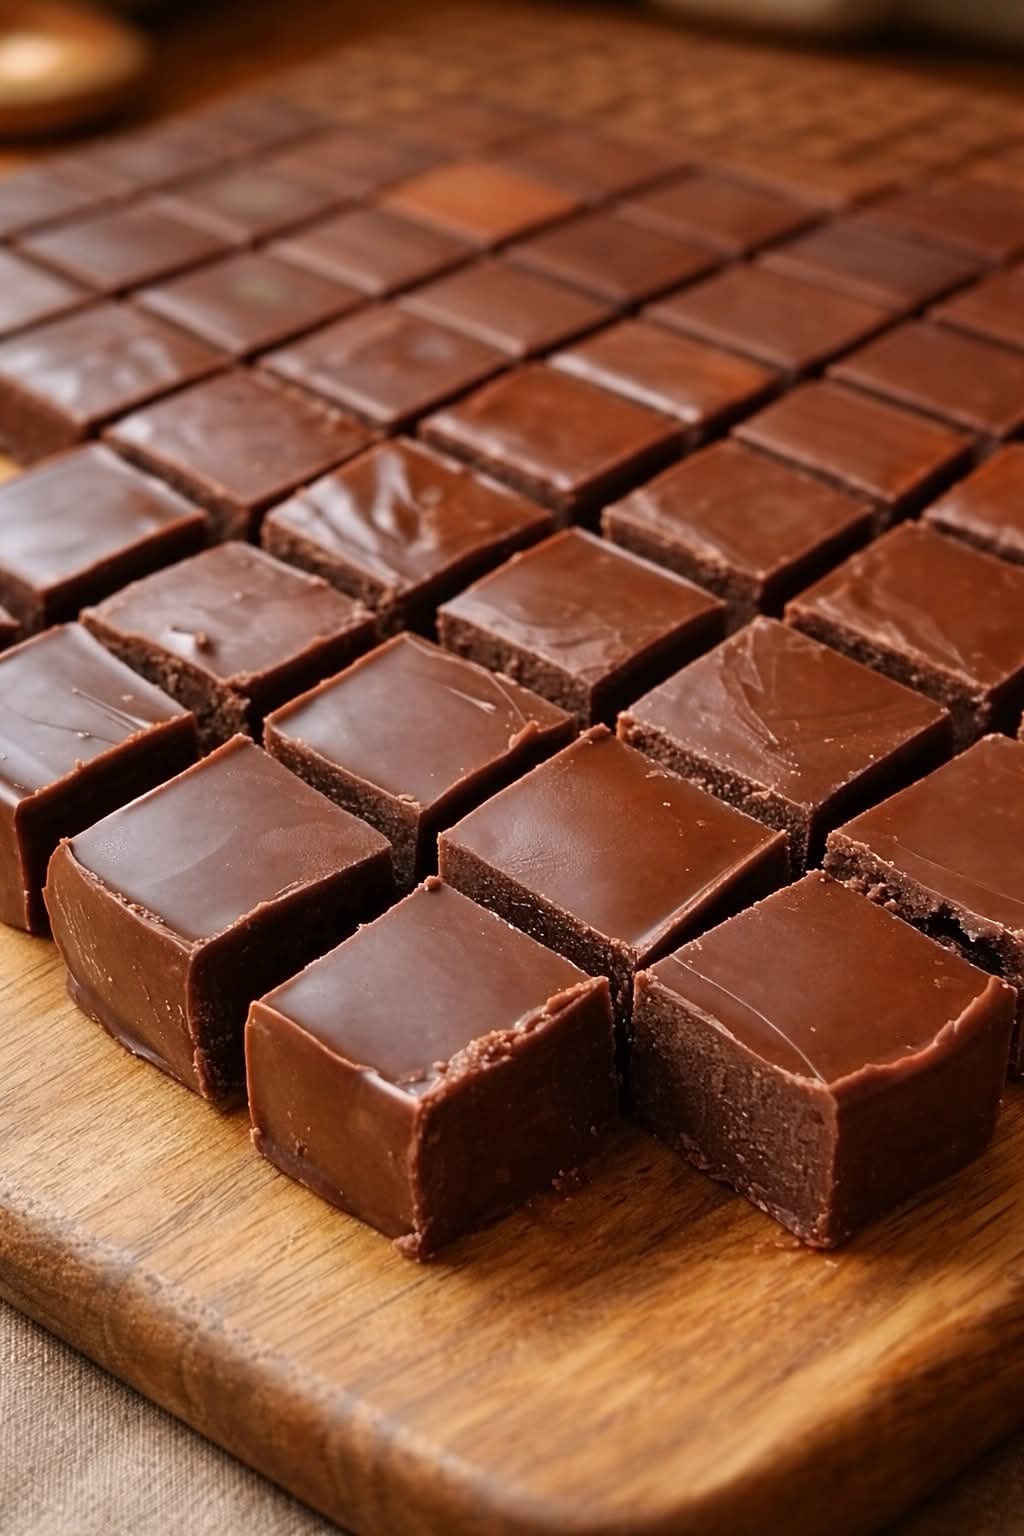
Use the parchment paper to lift the chilled fudge from the pan. Place it on a cutting board and use a sharp knife to cut it into small squares.
For especially clean cuts, wipe the knife between slices.
TIPS FOR MAKING THE BEST QUICK CHOCOLATE FUDGE
- Use short microwave intervals: Chocolate can burn quickly, so gentle heating is important.
- Stir frequently: Stirring distributes heat and helps the mixture become smooth.
- Do not overheat: Chocolate that becomes excessively hot can develop a grainy texture.
- Use good-quality chocolate: Since chocolate is the main flavor, the quality makes a noticeable difference.
- Line the pan: Parchment makes removing the finished fudge much easier.
- Let it set completely: Cutting too early can produce messy squares.
- Use a sharp knife: A clean knife helps create neat portions.
WHY DOES MY FUDGE HAVE A GRAINY TEXTURE?
Grainy fudge can happen when the chocolate is overheated or when the ingredients are not thoroughly combined.
When using a microwave, heat the mixture gradually and stir frequently. Do not assume the chocolate needs to look completely melted before you remove it from the microwave. The residual heat will continue melting the chocolate as you stir.
Another useful tip is to make sure the sweetened condensed milk is thoroughly incorporated into the chocolate mixture before transferring it to the pan.
HOW TO MAKE EXTRA CREAMY CHOCOLATE FUDGE
The combination of chocolate, sweetened condensed milk, and butter naturally creates a creamy texture. For the smoothest result, avoid overheating the mixture and stir until it becomes completely uniform.
Allow the fudge to chill gradually in the refrigerator. Once fully set, it should have a firm but creamy bite rather than a dry or crumbly texture.
CHOOSING THE BEST CHOCOLATE
Semi-sweet chocolate chips are an excellent choice for this recipe because they provide a balanced chocolate flavor without making the fudge excessively sweet.
You can also experiment with other varieties.
Milk Chocolate
Milk chocolate produces a sweeter, creamier fudge with a mild chocolate flavor.
Dark Chocolate
Dark chocolate creates a richer, more intense fudge that is ideal for people who prefer less sweetness.
Chocolate Chunks
Chopped chocolate bars can also be used. They may melt differently from standard chocolate chips, so monitor the mixture carefully.
CHOCOLATE FUDGE VARIATIONS
WALNUT CHOCOLATE FUDGE
Fold 1/2 cup of finely chopped walnuts into the melted chocolate mixture. Walnuts add crunch and a slightly earthy flavor that complements the rich chocolate.
PECAN FUDGE
Use chopped pecans instead of walnuts for a buttery, nutty variation.
SEA SALT CHOCOLATE FUDGE
Sprinkle a small amount of flaky sea salt over the top before chilling. The salty contrast makes the chocolate flavor stand out.
ESPRESSO CHOCOLATE FUDGE
Add approximately 1/2 teaspoon of instant espresso powder to intensify the chocolate flavor. The finished fudge will not necessarily taste strongly of coffee; instead, the espresso can make the chocolate taste deeper.
PEPPERMINT CHOCOLATE FUDGE
Add a small amount of peppermint extract and sprinkle crushed peppermint candies over the top before chilling. This version is especially suitable for holiday dessert trays.
PEANUT BUTTER CHOCOLATE FUDGE
Swirl spoonfuls of smooth peanut butter over the warm fudge before chilling. Use a knife to create a simple marbled pattern.
COCONUT CHOCOLATE FUDGE
Fold shredded coconut into the mixture or sprinkle toasted coconut over the top.
CHOCOLATE CRANBERRY FUDGE
Add dried cranberries for a sweet and slightly tart contrast to the chocolate.
HOW TO MAKE A TWO-LAYER CHOCOLATE FUDGE
For a more decorative dessert, prepare the basic chocolate fudge and divide the mixture between two flavors.
For example, one layer can remain classic chocolate while the second layer can include peanut butter or chopped nuts.
Spread the first layer evenly in the pan and allow it to firm slightly before adding the second layer. Chill until completely set before cutting.
HOW TO CUT PERFECT FUDGE SQUARES
Clean cuts can make homemade fudge look much more professional.
- Chill the fudge completely before cutting.
- Use a large, sharp knife.
- Warm the knife slightly if necessary.
- Wipe the knife clean between cuts.
- Cut the slab into even rows.
For party trays, small squares are usually ideal because fudge is rich and satisfying. For gifting, slightly larger squares can create a more substantial presentation.
HOW TO STORE 3-MINUTE CHOCOLATE FUDGE
Store the finished fudge in an airtight container. Separate layers with parchment paper to prevent the pieces from sticking together.
The fudge can be stored in the refrigerator for a firmer texture. Allow individual pieces to sit at room temperature for a few minutes before serving if you prefer a softer bite.
Always keep the fudge well covered to prevent it from absorbing odors from other foods in the refrigerator.
CAN YOU FREEZE CHOCOLATE FUDGE?
Yes. Chocolate fudge freezes well when properly wrapped.
Cut the fudge into individual portions and wrap them tightly. Place the wrapped pieces in an airtight freezer-safe container or freezer bag.
When you are ready to enjoy the fudge, transfer it to the refrigerator and allow it to thaw gradually. You can then bring it closer to room temperature before serving.
Freezing individual portions makes it easy to remove only the amount you need.
HOW TO SERVE CHOCOLATE FUDGE
This easy chocolate fudge recipe is delicious on its own, but there are many ways to serve it.
- Serve small squares with coffee or tea.
- Add pieces to a holiday dessert platter.
- Package the fudge as a homemade edible gift.
- Serve it alongside cookies and brownies.
- Add chopped fudge pieces to an ice cream sundae.
- Use small pieces as a topping for chocolate desserts.
CHOCOLATE FUDGE FOR HOLIDAYS AND GIFTING
Homemade fudge makes an excellent holiday gift because it is easy to portion and package.
Cut the chilled fudge into uniform squares and arrange them in a decorative box or food-safe container. Separate the layers with parchment paper so the pieces remain neat.
You can create different varieties for a gift box, such as classic chocolate, walnut, peppermint, peanut butter, and sea salt fudge.
COMMON MISTAKES TO AVOID
Overheating the Chocolate
Chocolate can burn or become grainy when exposed to excessive heat. Use short heating intervals and stir frequently.
Skipping the Stirring
Stirring is essential because it distributes heat and combines the chocolate with the condensed milk and butter.
Cutting Before the Fudge Sets
Warm fudge will not produce clean squares. Give it enough time to become completely firm.
Using a Pan That Is Too Large
A very large pan will create a thinner layer of fudge. An approximately 8-inch square pan produces a thicker, more satisfying piece.
Adding Too Many Mix-Ins
Large amounts of nuts, dried fruit, or other additions can change the texture and make the fudge difficult to cut. Keep additions moderate.
FREQUENTLY ASKED QUESTIONS
Can I really make chocolate fudge in 3 minutes?
The active preparation can take approximately 3 minutes, depending on your equipment and ingredients. The fudge still needs time to chill and set before it can be cut and served.
Do I need a candy thermometer?
No. This quick chocolate fudge recipe uses a simple melted chocolate method, so a candy thermometer is not necessary.
Can I make this fudge without a microwave?
Yes. Place the chocolate chips, sweetened condensed milk, and butter in a heatproof bowl over a saucepan of gently simmering water. Stir until smooth, then remove from the heat and continue with the recipe.
Can I use evaporated milk instead of sweetened condensed milk?
No. Sweetened condensed milk is concentrated and sweet, while evaporated milk has a different consistency and contains much less sugar. They are not direct substitutes in this recipe.
Can I use dark chocolate?
Yes. Dark chocolate works particularly well if you prefer a richer and less sweet fudge.
Can I use milk chocolate?
Yes. Milk chocolate creates a sweeter and milder fudge. If you use very sweet chocolate, the finished fudge will naturally be sweeter.
Why won’t my fudge set?
The mixture may not have been heated and combined properly, or the ingredient proportions may have been changed. Make sure to use sweetened condensed milk rather than evaporated milk and allow sufficient chilling time.
Can I make this fudge with white chocolate?
Yes, although the flavor and texture will be different. White chocolate can be used to create a different style of quick fudge.
Can I add nuts?
Yes. Walnuts and pecans are especially good choices. Fold them into the mixture just before transferring the fudge to the pan.
Can I add peanut butter?
Yes. You can swirl smooth peanut butter into the top of the fudge before chilling or incorporate a modest amount into the chocolate mixture.
Can I make this recipe ahead of time?
Yes. Fudge is an excellent make-ahead dessert. Once completely set, store it in an airtight container until you are ready to serve it.
How long should chocolate fudge chill?
It generally needs about 1–2 hours in the refrigerator to become firm enough to cut. Chilling time can vary depending on the thickness of the fudge and your refrigerator.
Can I leave the fudge at room temperature?
Yes, for serving and short-term storage, provided it is kept covered and stored appropriately. For longer storage, refrigeration is a convenient option.
TROUBLESHOOTING YOUR CHOCOLATE FUDGE
If the Mixture Is Too Thick
If the mixture becomes difficult to spread, work quickly while it is still warm. A brief amount of gentle heat can help loosen it, but avoid overheating the chocolate.
If the Fudge Is Too Soft
Allow additional chilling time. If the fudge remains unusually soft, check that the correct type and amount of sweetened condensed milk was used.
If the Fudge Is Too Hard
Allow it to sit at room temperature for several minutes before serving. This can soften the texture and make it easier to bite.
If the Chocolate Looks Grainy
Continue stirring gently while the mixture is warm. Avoid adding water and avoid excessive heat, both of which can affect melted chocolate.
HOW TO MAKE THIS FUDGE MORE CHOCOLATEY
For an even deeper chocolate flavor, choose a good-quality dark or semi-sweet chocolate. You can also add a small amount of unsweetened cocoa powder or instant espresso powder.
Another simple option is to fold a small amount of finely chopped dark chocolate into the warm mixture before transferring it to the pan.
Be careful not to add too many dry ingredients because they can alter the smooth, creamy texture that makes this fudge so appealing.
HOW TO MAKE SMALL-BATCH FUDGE
If you do not need a full pan of fudge, you can make a smaller batch by reducing the ingredients proportionally and using a smaller container.
A smaller batch is useful when you want a quick dessert for a small household or when you want to experiment with different flavor combinations without making a large quantity.
HOW TO MAKE FUDGE FOR A DESSERT TABLE
For a dessert table, cut the fudge into small, uniform squares. Arrange the pieces on a serving platter with other bite-sized desserts.
Different toppings can make the same basic fudge recipe look completely different. Try crushed nuts, coconut, chocolate shavings, peppermint pieces, or a light sprinkle of flaky sea salt.
The rich chocolate flavor also makes this fudge an excellent addition to holiday dessert boards and party buffets.
WHY SWEETENED CONDENSED MILK WORKS SO WELL
Sweetened condensed milk is one of the key ingredients in this quick fudge recipe. It provides sweetness and contributes to the smooth, creamy consistency of the finished dessert.
Because the recipe relies on a simple melted mixture rather than traditional candy-making techniques, sweetened condensed milk makes it possible to achieve a satisfying fudge texture with minimal preparation.
THE BEST WAY TO MAKE THIS RECIPE AHEAD
If you are preparing fudge for an event, make it the day before whenever possible. This gives the fudge plenty of time to set completely and makes cutting much easier.
Once cut, store the pieces in an airtight container with parchment paper between layers. Keep the container covered until you are ready to serve or package the fudge.
FINAL THOUGHTS
This 3-minute chocolate fudge is proof that homemade desserts do not always require complicated techniques or hours in the kitchen. With chocolate chips, sweetened condensed milk, butter, vanilla, and a little salt, you can create a rich and creamy treat with very little active preparation.
The recipe is ideal for busy days, last-minute desserts, holiday baking, edible gifts, parties, and simple chocolate cravings. Once you learn the basic method, you can easily create new versions using nuts, peppermint, peanut butter, coconut, dried fruit, espresso, or sea salt.
For the best results, remember to heat the chocolate gently, stir frequently, keep the mixture smooth, line your pan with parchment paper, and allow the fudge enough time to chill completely before cutting.
Whether you make the classic version or customize it with your favorite additions, this easy chocolate fudge is a simple dessert that delivers rich chocolate flavor with minimal effort.